Home Assistant integration¶
A custom Home Assistant integration is maintained alongside the firmware (same author) and published at git.btclock.dev/btclock/homeassistant-btclock with a mirror on github.com/dsbaars/homeassistant-btclock.
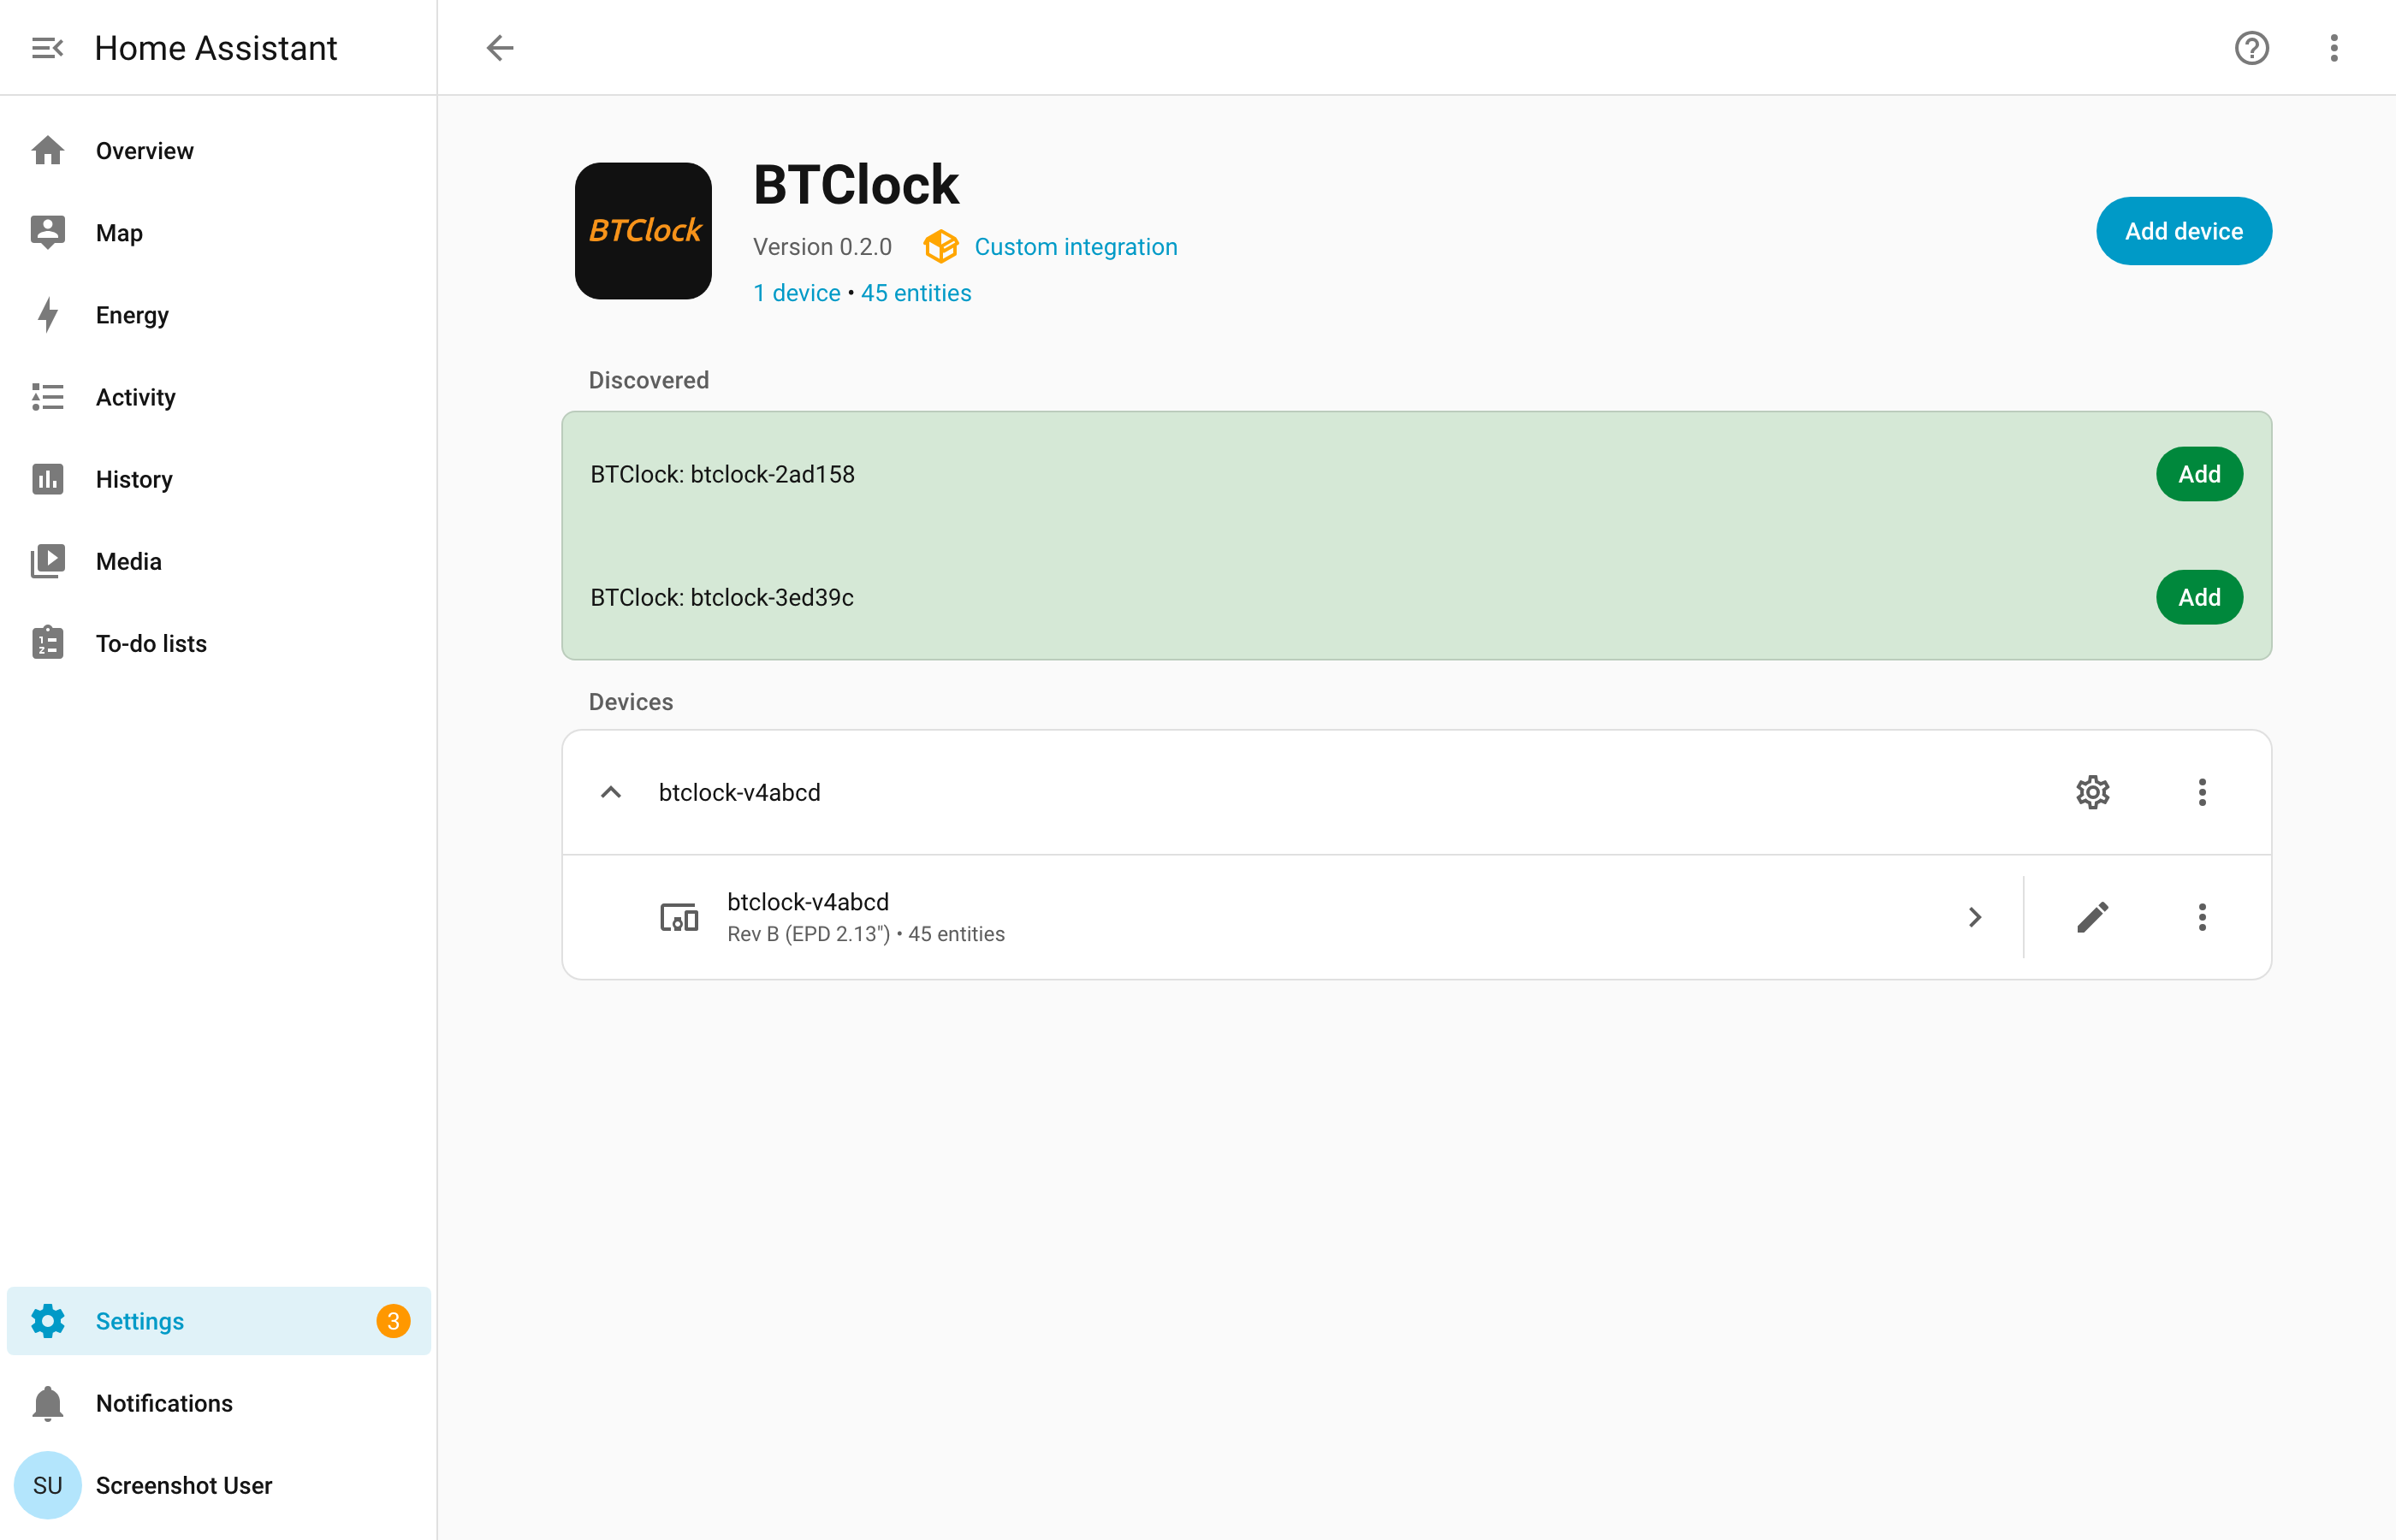
Install via HACS by adding the repo URL under "Custom repositories" → integration, restart Home Assistant, then add the BTClock through Settings → Devices & Services → Add integration → BTClock. Devices on the same multicast domain auto-discover within a few seconds of boot and appear under "Discovered" — see Authentication & discovery below for details.
If you're already signed into Home Assistant in this browser, the two buttons below open the right pages directly — the first adds the custom repository to HACS in one click, the second jumps straight to the BTClock integration's "Add integration" flow once it's installed.


The integration auto-detects which firmware generation it's talking to (legacy ≤3.3, v3.4, v4) and surfaces the appropriate entities. v4-only features — mining-pool selector, font selector, Bitaxe data source, pool poll cadences, and the Simulate Zap / Clear pool logos / Restart data sources actions — only appear on v4 devices, so the device card matches what your hardware actually supports.
Two update modes ship: Server-Sent Events (push, default — the device streams state changes to Home Assistant in real time) and Polling (configurable interval, for environments where long-lived HTTP connections aren't viable). Pick during the config flow; switch later via the integration's Configure dialog.
All screenshots in this document are reproducible. The
scripts/screenshottool in the integration repo boots a temporary Home Assistant against a stub BTClock seeded from the v4 fixture, captures the device-card sections, and crops them.
Device card layout¶
Once added, the BTClock surfaces as a single device with all entities grouped into Controls / Sensors / Configuration / Diagnostic. The screenshots below are taken from a Rev B device running v4 firmware with the BH1750 light sensor and PCA9685 frontlight populated.
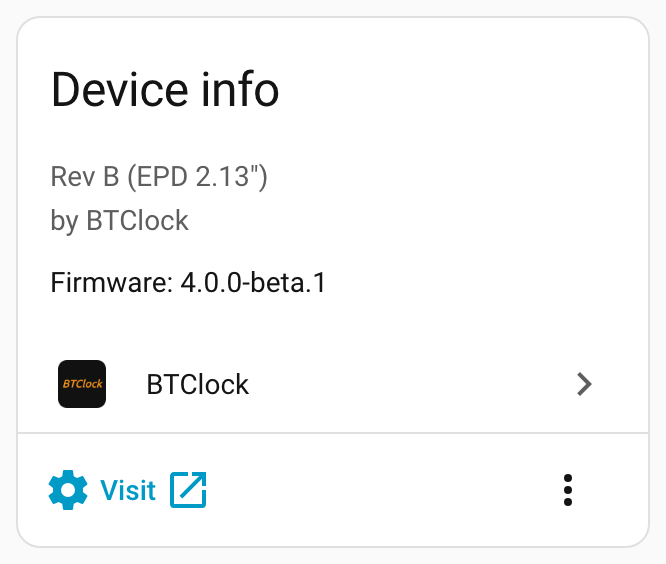
Device info¶
Hardware revision, firmware version, and a deep-link to the device's WebUI. The "Visit" button opens the WebUI in a new tab — handy for the few features the integration doesn't surface, like screen rotation order and firmware OTA staging (see WebUI tour).
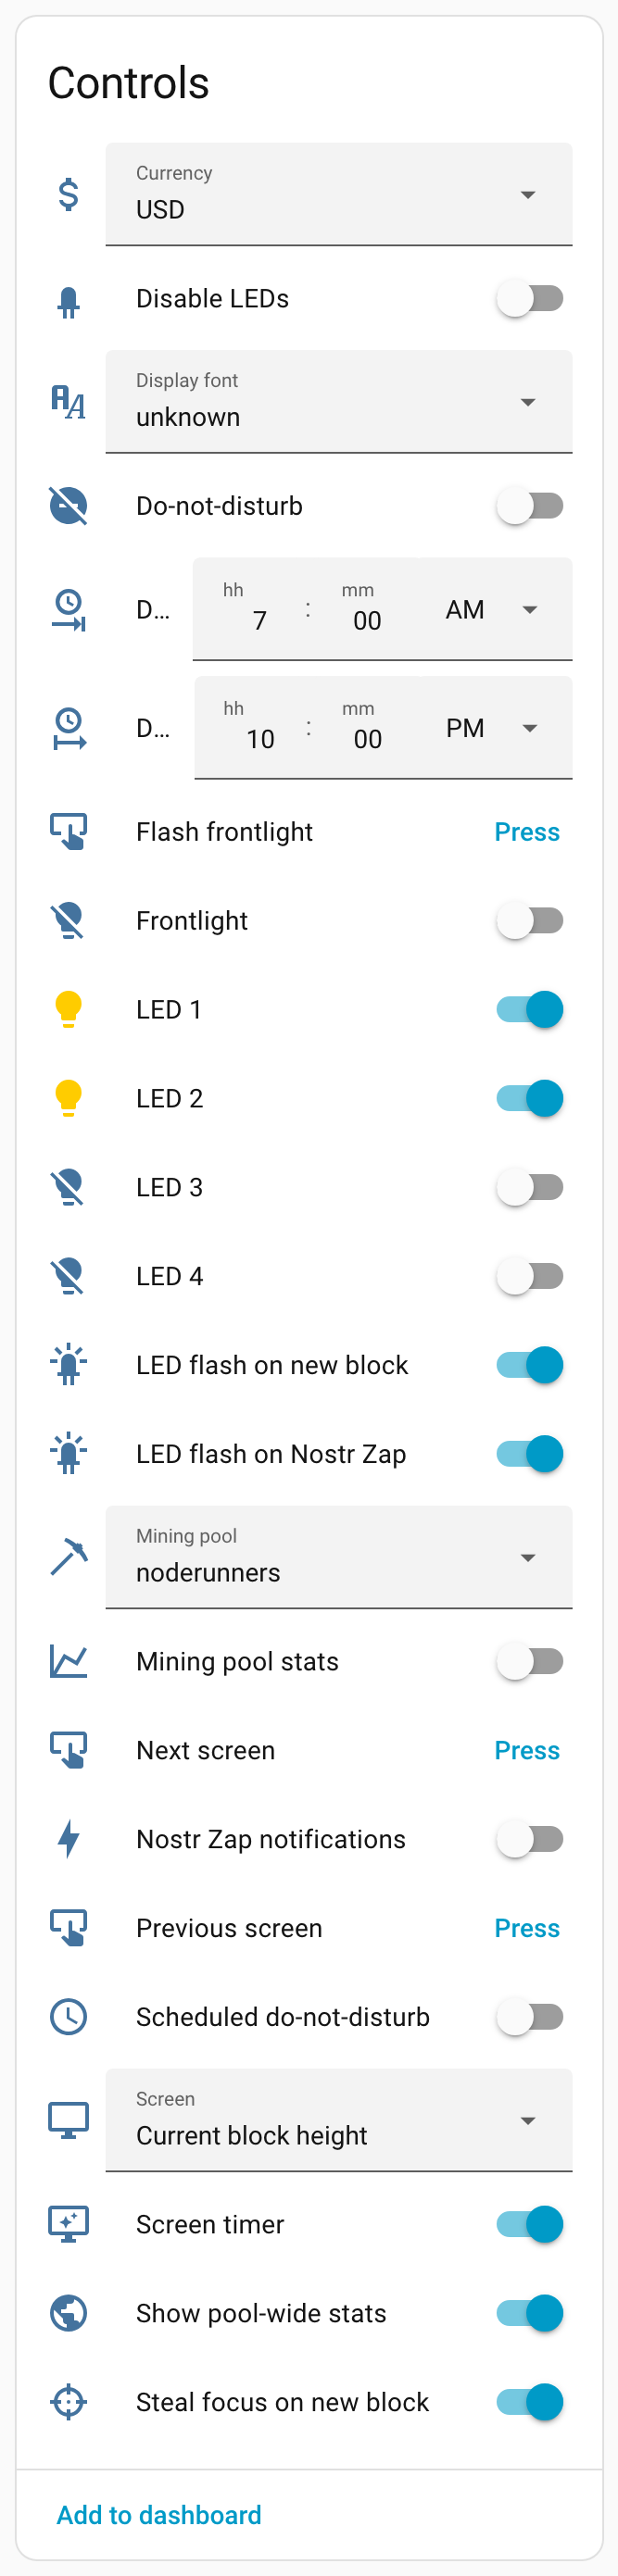
Controls¶
Day-to-day toggles, selectors, and momentary buttons.
The Currency picker switches the active price-feed currency, affecting the BTC ticker and Sats-per-dollar screens. Display font and Mining pool (v4 only) mirror the WebUI's font and pool choosers — see Fonts and the Mining-pool guide for what each option does.
LEDs 1-4 expose each NeoPixel as a separate colour entity, so an automation can paint individual pixels — e.g. red on a stalled price feed. Background on the LED strip lives under LEDs & frontlight; the device also plays its own indicator patterns for boot / WiFi / data-feed faults which are catalogued under LED status effects.
The Do Not Disturb start- and end-time fields schedule the device's nightly quiet window. They mirror the WebUI scheduler — see Do Not Disturb for what DND suppresses.
Momentary buttons cover the rotation controls (next / previous screen, toggle pause), a global LED-strip toggle, and a reboot.
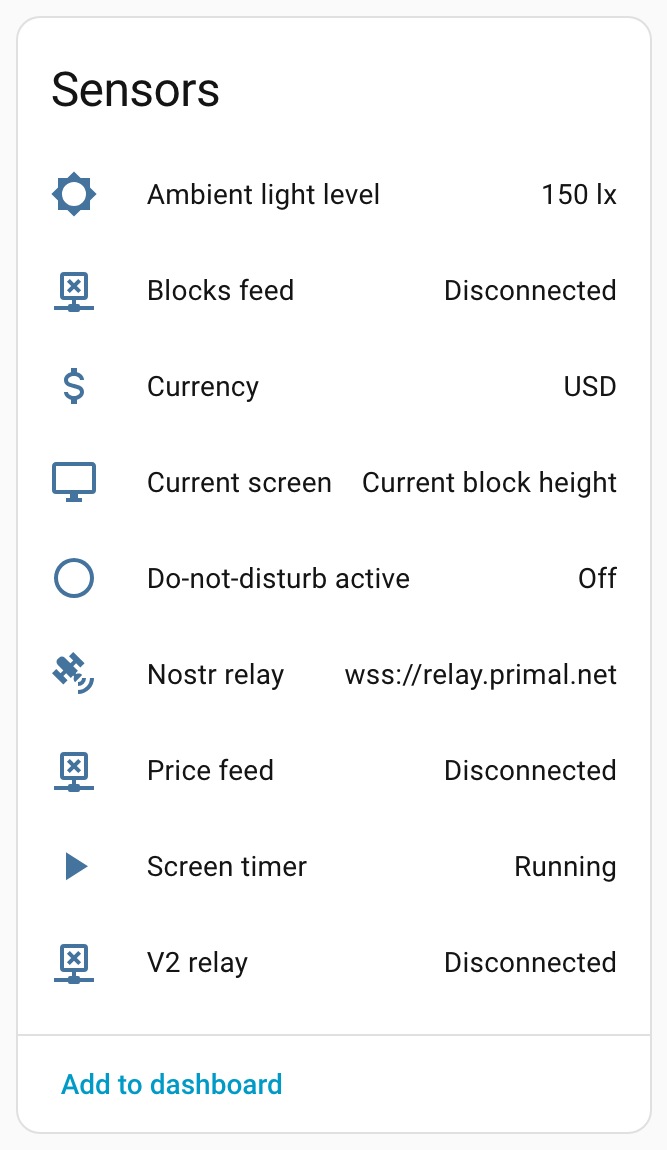
Sensors¶
Read-only state.
Price feed, Blocks feed and V2 relay mirror the connection indicators in the WebUI's Status card, so automations can react to a stalled feed — for example, notify when the blocks feed has been disconnected for more than ten minutes.
Ambient light level appears on Rev B devices with a populated BH1750 sensor and reflects the lux value the auto-brightness logic uses to dim the LEDs and frontlight at night.
Nostr relay exposes the configured relay URL as the entity state
and a connected boolean as an attribute, so a single template can
pick either. See Nostr zap setup for
what the relay is doing.
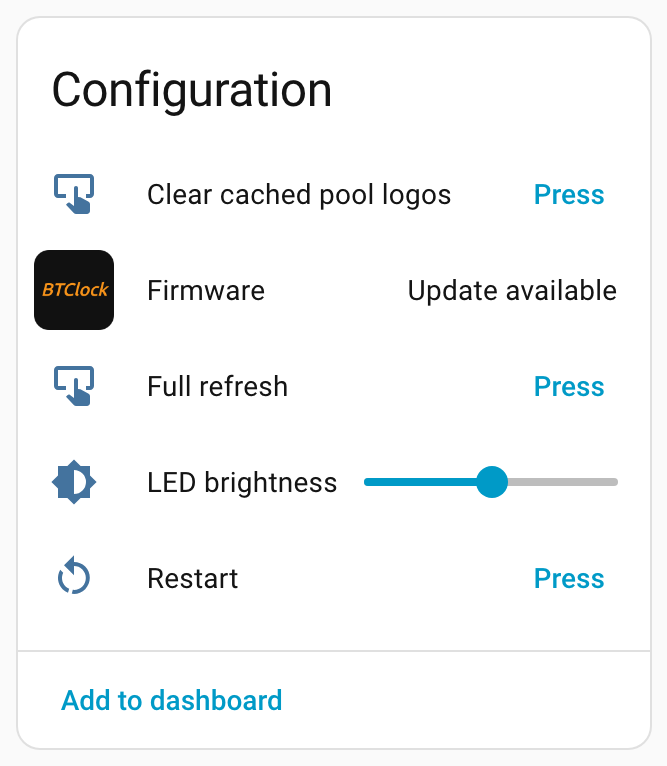
Configuration¶
Settings-card entities and lifecycle actions.
LED brightness is the global LED-strip brightness slider — the same control found in the WebUI's Light & LEDs section.
Firmware is Home Assistant's standard Update entity. It checks for new releases once a day and surfaces a one-click install — covered in detail under Firmware updates below.
Clear cached pool logos (v4 only) wipes the logo cache so the next mining-pool screen render fetches a fresh copy — useful after pointing the device at a custom logo URL.
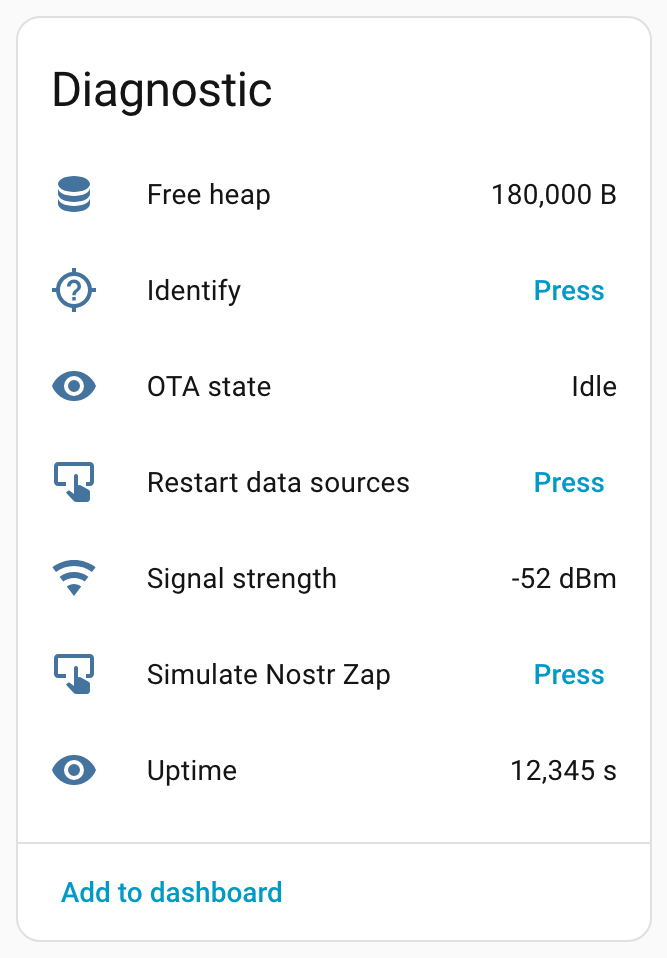
Diagnostic¶
Health metrics, an identify button, and the v4-only data-source actions.
Restart data sources reconnects the price, blocks, mempool and Bitaxe feeds without rebooting the device — a softer alternative to a full reboot when a single upstream feed gets stuck.
Simulate Nostr Zap triggers the full zap effect (LED flash plus on-screen overlay) without needing a real zap. Handy for verifying Nostr zap setup end-to-end, or for testing automations that react to the zap event.
OTA state is on while a firmware update is downloading or installing, so automations can suppress notifications during a flash.
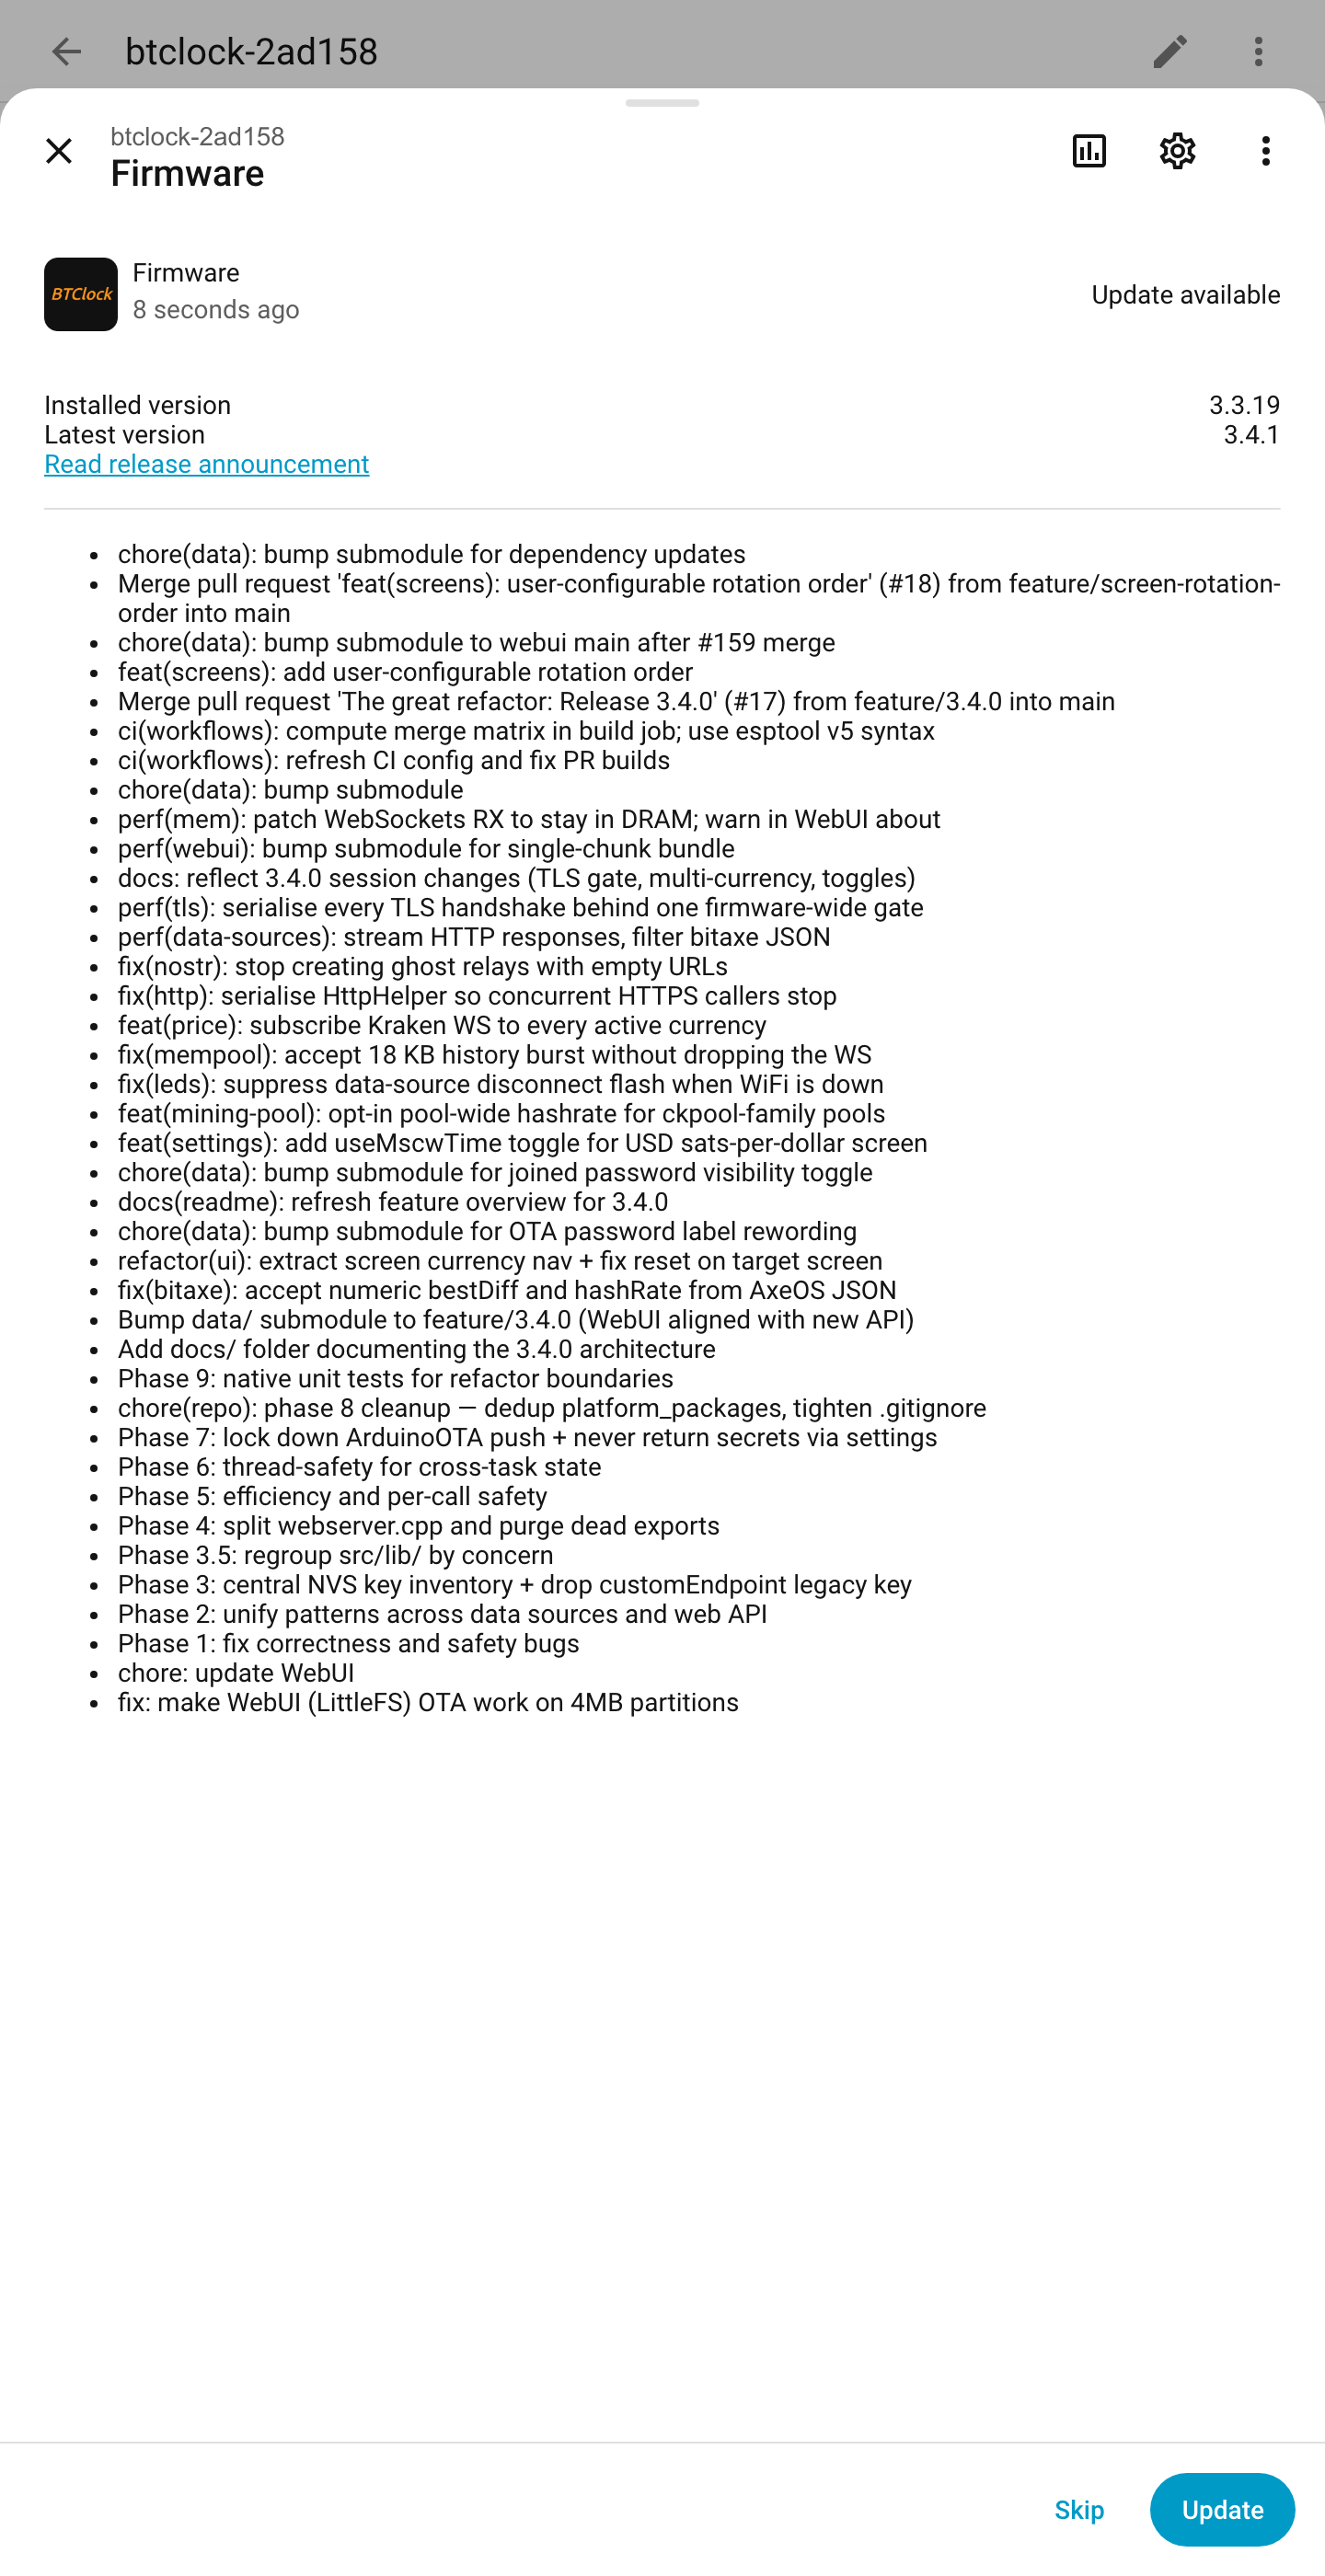
Firmware updates¶
The integration checks the device's release feed once a day. When a
newer firmware is available, the Firmware entity in the
Configuration section flips to Update available and the device card
shows the standard Home Assistant update prompt.
Clicking it opens the more-info dialog with the installed and latest versions side by side, the release notes (or a synthesized changelog when the upstream release has no body), and an Install button. The update itself is handed off to the device's own over-the-air updater — no need to keep Home Assistant in the loop while the firmware downloads.
For downgrades or pinning to a specific version, the dialog's overflow menu offers a version picker. The integration streams the chosen firmware and WebUI assets through Home Assistant and pushes them to the device, then waits quietly until it reboots onto the new version and refreshes the entity list to match the new firmware generation (legacy ↔ v3.4 ↔ v4).
For a deeper look at the update mechanics or the USB / WebUI flashing alternatives, see Firmware updates.
Development builds — anything not on a release tag — are skipped, so a
bench device you're actively flashing won't surface bogus update
prompts. Tagged prereleases (e.g. 4.0.0-beta.1) are eligible.
Services¶
Two domain-level services, callable on both v3.4 and v4:
btclock.show_text— display a short message across the panels, one UTF-8 codepoint per panel. Truncated to fit the number of panels; case is preserved (bundled fonts include lowercase ASCII). Same feature as the WebUI's Control card text input.btclock.show_custom— display one string per panel, for layouts the single-character form can't express.
Every button entity exposed by the device is also callable from
automations via button.press — handy for wiring a physical Zigbee or
Z-Wave remote to actions like "next screen" or "toggle pause".
Authentication & discovery¶
If you've enabled HTTP authentication on the device (Settings card → HTTP auth / OTA — see HANDBOOK §4.3), the config flow asks for the username and password on first contact. Credentials are stored in the integration entry and Home Assistant will prompt for new ones automatically if you ever change them on the device.
Auto-discovery relies on the device's mDNS broadcast — every BTClock
advertises itself as btclock-<id>.local on the local network. The
integration verifies each candidate before adding it, so unrelated
HTTP devices on the same network won't get picked up by mistake.